Plants, Pergolas and Pruning Tips!
It's all the 'P's this time.
Thanks to everyone who sent in their pergola pictures. They're fabulous! We'll be having a look at them in a moment.
Well, it has certainly been wet this winter, to say the least, but with the rain comes milder weather, and it does have it's advantages. Many plants - usually killed off by the colder weather - have remained unscathed. Phew!
There’s a big difference between the way my garden looked last year, after 18" of snow, and the way it looks this year. It does benefit the hardier perennials to be absolutely ‘floored’ with the cold, but it's heartening that some of the more delicate plants have survived.
Often, I lose this erysimum 'Bowles Mauve' to the frost and have to replant it each year, but this time it has sprung to life with fresh new flowers.

One of the real bonuses of a mild winter, for me, is the survival of my diascias! Here is one below, looking like a bad hair day in Plantsville, and then in full bloom later in the year. Would you believe it? All from one plant!
It’s the same with all perennials – they die back in the winter and reappear, miraculously, in the growing season - but diascias are usually grown as annuals for bedding displays, hanging baskets and tubs, as they are only hardy to -8 degrees celsuis, so it makes their resurgence all the sweeter.
  |
This diascia, like all perennial plants in their dormant season, looks like it needs to put in the composter! If you try to move them, they will die, so, if you do want to keep them, hands off! ...and this is the same plant in the summer. Can't get better than that! |
Thinking about plants, this is the new one I was going to tell you about. I was going to order one of these plants last year and didn’t get round to it. This year I’m determined!
It's the same type of plant as the everlasting sweet-pea (Lathyrus), the one that we use as a climbing plant, and the one that comes up every year (unlike the annual sweet-pea, which needs replanting). Here is the tall version clambering through a pink climbing rose. So romantic!

It’s the newer, low growing form, standing only 45cm high, that I’m interested in at the moment. It's called 'lathyrus vernus', and turns from reddish-purple to bluish-purple through March to May (much earlier than the climbing variety).
|
This low-growing plant will be ideal for planting around pergola posts, on the edges of paths or at the front of border with other blue, pink, grey or lime green flowers and foliage. |
The information from the online garden centre is clear and informative (click on the picture), with positioning, height and spread, flowering time, care and finding plants that go well together tips. It's very useful to use as a reference.
Your Pergola Pictures
On to the nitty-gritty...
Now that things are hotting up in the garden, here are some pergola pictures to inspire you. They have been built by fellow readers. As there have been so many new people requesting the ezine recently, there may be a couple some of you have seen before. Bear with...
And very well done to all those who have not only built their wonderful pergolas and arches but have also managed to send a picture. Not always easy, but very much appreciated!
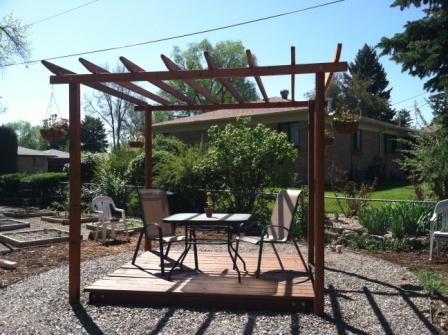
Jocelyn Brookstein from the US built this pergola and deck combination. What a triumph! It's just fantastic, Jocelyn!
 |
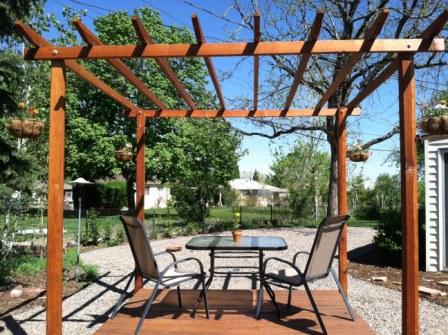 |
Very stylish in the simplicity of its design, it shows how the pergola plans can easily be adapted to create completely different styles. This pergola looks fabulous in the space, especially as it has the deck to give a focal point to the area used for sitting and relaxing.
Notice how Jocelyn has set the deck inside the posts of the pergola. It is also possible to build the posts within the decking joists and then cut the decking boards to fit around the posts. Either way looks great. You’ve made a fantastic job there, Jocelyn. Exceptionally well done.
Next we have two structures built by Rob Lipparelli. Very prolific in his garden building activities! Rob chose the hexagonal pergola design (from the additional plans) using it as an asymmetric walk-through pergola on an existing path. Wow (very creative). He planted climbing plants around the posts, making for a very interesting structure. Great job, Rob!
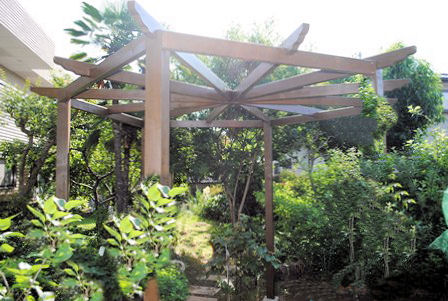
Rob does tend to be a bit accident prone, though. This is what happened when he built his pergola:
"If you are in the UK, not an issue, but for others, beware of the mosquitoes. As I was putting a rafter into place, a mosquito went up my nose, causing a jerk reaction. I came flying off the ladder and landed on some rocks next to the pergola. To add insult to injury, the timber I was holding came crashing down on my head. Wifey was laughing so much I thought she would lay an egg. I was in so much pain, but couldn't help laughing too."
Rob has a lot of greenery in his garden. He has a tendency to fall out of trees when pruning them. Recently, he dislocated his shoulder and broke two ribs, no less!
Rob made a great video of his little boy, Hiromu, building the pergola! Catch it here...
He also made an arch, set in his beautiful garden.

...and here is little Hiromu, of video fame, walking under the arch. Nice trellis detail, Rob!

Rob has several other projects planned including a pizza oven, a walkway and a tree house. Good luck with it all. Your track record is pretty impressive so far. But do be careful! We will be waiting eagerly to hear all about it.
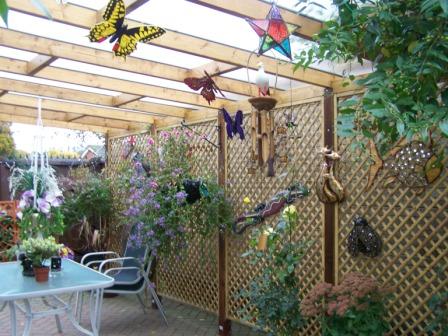
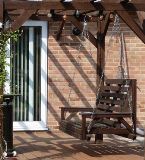
Now we come to the lean-to attached pergolas, one made by John Kennedy and the other made by Jeff. So different, and yet so wonderful. Neighbours asked John to create structures in their gardens, too.
How lovely are these on a summer's evening!
 |
 |
Very well done all of you. You should be very proud of yourselves!
Thank you for sharing your pictures, and to Rob for his entertaining stories! Find them here...
Clear and Prune
Apart from building pergolas, there’s a lot to do in the garden at the moment (unless, of course, you’re the ultra-organised type, who does everything at the right time!).
Sometimes it isn’t always possible, or desirable, to cut everything back in the autumn, so now is the time for a bit of tidying up! As well as the plants coming into bloom, we also have more energy and inclination to tackle the garden.
Clearing isn’t that bad in the late winter, as most perennials have completely died back, and the stalks are fairly easy to pull out. If you pull part of the roots out by mistake, plant in another part of the garden or give to a friend (they’re sure to reciprocate!). Flowers are beginning to poke their heads through, so it’s better to give them a clear run, where they can be seen and enjoyed.
Check your roses and clematis...
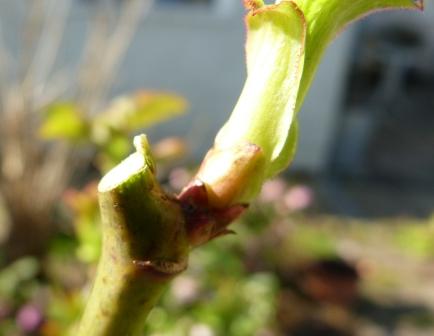
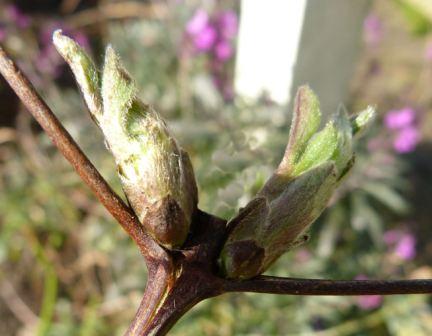
To prune roses, cut out any dead wood or branches that grow inwards, leaving healthy outward facing buds. Notice in the pictures below that, for alternate shoots, the stem is cut at an angle and very close to the node, whereas with the pair of opposite buds on the clematis, the cut is made straight across. This is a general rule of thumb.
If you cut the stem further away from the node, the bit left above the node will go brown and die - not great for the plant and unattractive with the dead parts showing.
It's always a good idea to have a book handy specifically for pruning, (I always recommend the RHS 'Pruning and Training') as there are so many different ways to train climbing plants, especially roses, whether it's against a wall or fence, or by a pergola. There are many such books about, so if you'd like to give your plants the best chance, it might be worth picking one up at the book shop the next time you're browsing.
However, generally speaking, climbing roses should ideally be tidied up in the autumn, but, if you've left it for sunnier times, you will need to do this in late winter. Do a general tidy up and then cut out the oldest stems at the base to encourage new ones. Some will probably have started to shoot anyway. Tie these in if they are long enough. Also tie in new shoots clambering along the rafters. Deadhead to a healthy leaf axil when flowers fade, later on, to encourage more blooms.
Ramblers can get a bit tangled, so it's a good idea to prune 1 in 3 of the flowered stems after flowering and shorten the side shoots by 2/3rds.
Sprinkle all roses with a general or rose fertilizer in spring and add some well-rotted compost or manure at the base to keep the rose healthy and blooming marvellous.
If you find it difficult to remember this, jot it down on a piece of paper and take it outside with you.
 |
 |
For my Group 2 clematis, 'The President', I cut out any dead wood, leaving strong growth, and then cut about a third of these healthy stems back to strong buds to stimulate new shoots for flowering later in the season. I prune, after flowers have faded, to a strong pair of buds to overlap the flowering season even more.
Here are the guidelines for pruning the different groups of clematis. It's not as difficult as you might think!
Group 1
The early flowering type, such as the montanas (those are the ones you see growing up house walls that have small pink flowers and a vigourous habit), the alpinas (very pretty with small, nodding heads) and the macropetalas.
Ha! - they hardly need pruning at all. Immediately after flowering, just cut out shoots from the base to thin out if necessary but otherwise leave alone. If they get terribly overgrown or your house wall needs painting! just cut them back to about 1' and they should sprout again.
Group 2
These are the large flowering types that flower in early summer on the previous years growth, then in late summer on new growth. In late winter/early spring cut out weak or damaged shoots and thin out plant by cutting some stems to a new pair of shoots. This group needs minimal pruning and can be cut back hard every 3 to 4 years.
Group 3
Cut out any damaged wood. If in doubt cut back to strong leaf buds at 12" in early spring before new growth begins.
How easy is that!
On the left, you can see the President's beautiful form and, on the right, in the top left corner, the wonderful contrast with the pink phlox.
 |
 |
To prune effectively, it's always a good idea to keep your plant tags, so that you know what type of plant you have! This is especially useful with clematis and roses.
Here's to beautiful flowers and a fantastic garden.
Advertising Links
This page may contain advertising links earning a small commission, at no extra cost to you. It is my hope these links will help you to make informed and creative choices.
Love Gardening! Ezine
Join the 'Love Gardening!' Ezine and receive garden and landscaping tips, exclusive voucher codes and updates to the website. More...
Recently Released
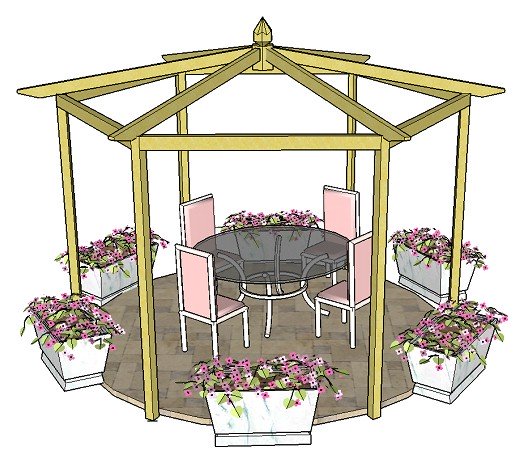
Pitched Roof Hexagonal Pergola
Other
Pergola Plans
Free Simple Pergola Plans
Attached Lean-to Pergola
Free Raised Bed Plans
Corner Pergola
Hexagonal Pergola
Asian Pergola
Seated Arbour
"The plans were great, very concise, easy to follow and I couldn't have managed without them!" T.
“Well done for a really useful site!” Mike.
Love the templates for the Rafter Tails! Using Design #5. Thanks so much." Laura.
"I love your website! Your entire site is incredible. I was able to get ideas for my pergola, which looks fantastic." Wayne.
Great service. Now all I have to do is build it! Martin.
"Your plans look amazingly comprehensive. I see you are intending putting the plans for the corner pergola on this fabulous site. Could you please tell me when the corner pergola plans will be available to purchase...yours is the nicest design I have seen!" Michelle.
Plants and Seed Offers
Pergola Kit and Accessories Offers
£340 off
£79!


Sales & Offers
Beautiful 'Gainsborough' gazebo
Save £204!
See my 'Fantastic Offers' page for more bargains on pergola kits, tools and all things gardening!


